Categories
Blog

Sandy Soil, Solid Roots: Water-Wise Landscaping on the Coast

Coastal sandy soils drain fast, run hot, and hold little nutrition. The fix is design + soil building + plant choice + precise watering: slow wind and sun, add stable organic matter and biochar, favor salt- and heat-tolerant species, and run low-volume drip on longer, deeper cycles with generous mulch.

Table of contents:

  1. Understanding Coastal Sandy Soils

  2. Water-Wise Design Principles for Coastal Yards

  3. Building Better Soil: Amendments and Techniques

  4. Planting Strategy for Salt, Wind, and Heat

  5. Irrigation, Mulching, and Maintenance Calendar


Understanding Coastal Sandy Soils

Sandy coastal profiles are dominated by large mineral particles with big pore spaces. Water falls through quickly, leaving roots thirsty just hours after irrigation, and nutrients travel with it. These soils are also low in organic matter, which means weak aggregation, poor cation exchange, and little buffering against salt spray or fertiliser burn. Add reflective heat from nearby hardscape and onshore winds that desiccate leaves, and you get the classic coastal struggle: plants that look fine after rain but wilt between cycles.

Yet the same properties can be turned into strengths. Fast drainage prevents waterlogging; warm soils kickstart growth in spring; and a light texture means easy shaping and trenching for irrigation laterals. The goal is not to fight sand, but to engineer a root zone that mimics a loam: more spongy organic matter, micro-pores that hold water, and a canopy that shades and slows evaporation. Pair that with salt-aware plant palettes and you can have a lush, resilient garden that thrives through wind and heat waves.

Two realities shape every decision near the shore. First, salt moves in aerosols and splash, so edge plants and windward faces need species that tolerate leaf salt plus brief soil salinity spikes. Second, storms can dump heavy rain, followed by drought. That argues for deep-root architecture, flexible irrigation schedules, and plant groupings that handle both extremes without constant intervention.

Key takeaway: your landscape succeeds when the root zone stays moist longer and the leaf zone loses water slower—everything else supports those two objectives.


Water-Wise Design Principles for Coastal Yards

Start with the layout before amendments or plant shopping. Thoughtful design reduces water demand by 30–50% simply by moderating microclimate and grouping needs.

Orient and shield. Use fences, trellises, or densely branched evergreens on the windward boundary to break wind energy rather than stopping it completely. A porous barrier (40–50% solid) slows wind, creating a calmer “shadow” where irrigation works more efficiently. Integrating dappled shade via narrow-crowned trees or pergolas to cut leaf temperature and surface evaporation on hot south- and west-facing exposures.

Hydrozones. Group plants with similar water needs and salt tolerance. Keep high-need edibles or tender ornamentals close to the spigot and in the most sheltered pocket; run a lean, rugged palette on the outer ring. This avoids over-watering tough natives just to keep a thirsty specimen alive.

Soil depth and shape. In sand, vertical dimension matters. Raised beds filled with amended sandy mix build a thicker moisture reservoir; broad, shallow swales collect roof runoff and spread it into the root zone. Where grade allows, add gentle berm-and-basin patterns that hold water long enough to infiltrate without pooling against foundations.

Hardscape with purpose. Light-colored paths and permeable pavers reflect less heat and allow rain to bleed into adjacent beds. Narrow ribbons of river rock at drip lines slow splash and reduce salt bounce-back onto foliage during windy showers.

Smart constraints. Embrace smaller lawn footprints, and pick warm-season grasses rated for salt and drought if turf is non-negotiable. Replace tricky corners and parkway strips with groundcovers that knit sand, accept radiant heat, and swallow foot traffic better than lawn can.

Design bottom line: soften wind, stage shade, and capture water where plants can use it. When the site does passive work, irrigation becomes a fine-tuning tool, not a life-support machine.


Building Better Soil: Amendments and Techniques

Sand becomes plant-friendly when we add stable carbon, build micro-structure, and slow water’s exit. Quick fixes like peat alone slump and disappear in months; aim for materials that persist and improve pore distribution.

Table — Amendments for Coastal Sandy Soils

Amendment Primary purpose How it helps sand Typical application (new beds) Notes for coastal use
Well-finished compost Boost organic matter, biology Increases water-holding, nutrient exchange, micro-aggregate formation 2–3 inches tilled into top 8–10 inches (or 1–2 inches as top-dress twice yearly) Use low-salinity composts; rinse if in doubt before incorporation
Pine bark fines Structure, slow breakdown Adds long-lived particles that resist collapse and keep micro-pores open 20–30% by volume in planting backfill or raised-bed mix Slightly acidic—helpful for many coastal ornamentals
Biochar (charged) Stable carbon, moisture buffer Holds water and nutrients in its pore network; improves microbial habitat 5–10% by volume; pre-charge with compost tea or fertiliser Excellent in sand; uncharged biochar can tie up nutrients—always charge first
Coarse composted mulch Surface evaporation control Reduces soil temperature and wind scouring; slows raindrop splash 2–3 inches on top, kept off stems by 2–3 inches Prefer mixed particle sizes for lock-in; avoid salty seaweed mulches unless leached
Wetting agents (soil surfactants) Fix hydrophobicity Helps dry sand accept water evenly and reduces runoff Label-rate drenches seasonally as needed Use sparingly; reapply after heavy rains if water beads off soil
Organic slow-release fertilisers Gentle nutrition Feeds soil biota; reduces leaching spikes Label rate, split spring/summer Pair with compost; avoid high-salt synthetics near tender roots

Technique matters as much as material. Till only once to incorporate the first big addition of compost and bark fines, then switch to no-till top-dressing to build structure from above. Frequent deep-forking fractures compaction bands created during construction without pulverising aggregates. In existing beds, core aeration followed by compost top-dress and irrigation pulls organic fines down into the profile.

Raised solutions. Where native sand is extremely lean, build 12–18 inch raised beds with a blend of washed sand, pine bark fines, screened compost, and a small fraction of charged biochar. This custom profile retains air even when wet, yet protects roots through dry spells. Border these beds with wind-permeable screens so the surface doesn’t crust.

Salinity awareness. Avoid amendments that import salt. Kelp and fish emulsions can be useful in tiny doses but may add sodium or chloride; if you use beach-gathered organics, leach thoroughly and test EC on a small batch first. After storm surge events, flush beds deeply to push salts beyond the root zone.

Soil-building bottom line: durable carbon + gentle biology + surface protection transform sand from sieve to sponge.


Planting Strategy for Salt, Wind, and Heat

A coastal palette should be function-first: stabilize soil, filter wind, cool the ground, and still look good year-round. Think in layers so that roots occupy different depths and foliage shares the workload against sun and spray.

Ground layer (bind and cool). Use creeping, mat-forming species that grip sand and knit the bed’s edge; they shade the top inch of soil where evaporation is fastest. In warm coastal zones, prostrate or low-arching groundcovers can cut surface temperatures by double digits at midday. Favor selections rated for salt tolerance and root vigor so they rebound after wind-burn.

Shrub layer (filter and frame). Shrubs do the heavy windwork. Choose porous, twiggy architectures that slow gusts rather than form solid walls that topple. Stagger plantings so wind loses energy in stages from the boundary inward. Many evergreen shrubs also carry waxy leaves that shed salt better and maintain winter structure for privacy.

Upright accents and small trees (dappled shade). Narrow-crowned species place shade exactly where patios, paths, or beds need relief. In sandy soils, prioritize species with strong taproots or flexible wood, trained early with single leaders and structural pruning to resist breakage. Place them upwind of delicate beds to create filtered light during the hottest hours.

Right plant, right hole. In sand, the planting hole should be wide, not deep. Backfill with the native sand blended with pine bark fines and a modest portion of compost; avoid creating a stark “pot” of rich soil that roots won’t leave. Water the backfill as you go to settle voids, then mulch immediately to preserve profile moisture.

Establishment rhythm. Even drought-tough coastal plants need a high-frequency, low-volume schedule the first six to eight weeks to knit roots through the amended zone. After that, stretch intervals to encourage depth, never letting the top inch dictate the schedule. Plants that learn to “live on the surface” will struggle every windy afternoon.

Aesthetic coherence. Cohesion comes from repeating textures—fine groundcovers against bold, leathery leaves; upright plumes against rounded mounds. In coastal light, silvers and glaucous greens read cool and resilient, and they often coincide with salt-tolerant foliage traits (thicker cuticles, reflective hairs). Choose flowers for shoulder seasons when heat is moderate; the palette still reads lush while water demand stays low.

Planting bottom line: layer for function, train for structure, and teach roots to hunt deep water from day one.


Irrigation, Mulching, and Maintenance Calendar

Sandy coastal soils reward precise, gentle irrigation. Big, infrequent dumps rush past the root zone; daily spritzes keep roots shallow. The sweet spot is low-volume emitters run long enough to wet 8–12 inches down, with recovery time between cycles.

  1. Drip and micro-emitters. Use pressure-compensating dripline or button emitters (0.4–0.9 gph equivalents) arranged by hydrozone. Keep runs simple, with isolation valves so you can tune thirsty beds without drowning tough borders. In windswept sites, avoid high spray arcs that atomize water and invite salt deposition on leaves.
  2. Scheduling by season (zones 8–9 as a guide). In spring, run two to three deep cycles per week depending on rainfall; in peak summer heat, step to three to four but keep runtime focused on depth rather than frequency. As autumn cools, dial back gradually; winter may need occasional deep soaks during long dry spells to protect evergreens from desiccation. Always check the actual depth of wetting with a simple probe; adjust minutes, not just days.
  3. Mulch mechanics. A 2–3 inch mixed-texture mulch (chunky composted bark blended with fines) is the single highest ROI for water-wise performance. It reduces surface temperature, shields soil microbes from UV, buffers against salt splash, and breaks down into humus over time. Pull it back slightly from crowns and trunks to avoid rot. In beds exposed to strong wind, stitch mulch with discreet pins or use slightly heavier top dressing along edges to prevent blow-off.
  4. Fertilising and monitoring. In sand, soluble nutrients wash through; choose slow-release organics split into two light applications rather than a single heavy dose. Pair this with leaf-color observation and occasional soil moisture checks at depth. A cheap tensiometer or capacitance probe can pay for itself by preventing guesswork—especially in the first summer after planting.
  5. Storm readiness and recovery. Before forecasted gales, water deeply so plants face wind with turgid cells; dry plants stress faster. After salt-spray events, hose-rinse foliage in the cool of morning and schedule a long leaching irrigation to push salts below roots. Prune broken wood promptly with clean cuts and restore canopy balance without over-thinning.
  6. Calendar summary: spring—establishment and shaping; summer—shade and depth-oriented watering; autumn—top-dress compost and adjust runtimes down; winter—selective deep soaks and structural pruning. Consistency beats intensity in sand.

Conclusion — what makes coastal sand thrive:
Design that calms wind and heat, soil that behaves like a sponge, plants chosen for salt and sun, and irrigation tuned to depth rather than habit. When these levers work together, sandy coastal yards become low-maintenance, cool-running landscapes that look better with less water and fewer interventions every season.

Categories
Blog

Pink Muhly Grass Care in Zones 8–9

Pink muhly grass (Muhlenbergia capillaris) thrives in hot, humid, sandy, and salt-kissed landscapes of Zones 8–9. Give it full sun, fast-draining soil, light watering after establishment, and a once-a-year cutback. Space clumps well, avoid over-fertilizing, and you’ll get airy pink plumes each fall with minimal upkeep.

Table of contents

  • What Makes Pink Muhly Grass Perfect for the Southeast (Zones 8–9)

  • Planting Pink Muhly: Soil, Sun, and Spacing

  • Watering, Fertilizing, and Seasonal Maintenance

  • Troubleshooting: Pests, Diseases, and Common Mistakes

  • Design Ideas and Companion Planting for Coastal Yards


What Makes Pink Muhly Grass Perfect for the Southeast (Zones 8–9)

Pink muhly grass has earned cult status across the Southeast for one simple reason: it looks spectacular with almost no fuss. Those cotton-candy plumes that glow at sunrise and sunset appear just when many coastal gardens are winding down—September through November—and they hold well into early winter. Beneath the show, the plant is doing serious work for you: binding sandy soils, shrugging off salt spray, and handling heat in stride.

Climate fit. Zones 8–9 deliver long, warm growing seasons and periodic droughts punctuated by heavy rains. Pink muhly’s deep, fibrous roots equip it for both. After the first season, it weathers dry spells without complaint, yet it also copes with those deluges that follow tropical systems—provided soil drains quickly. On barrier islands and coastal plains, where soils are often lean and slightly alkaline to neutral, muhly keeps its tidy, vase-shaped form.

Salt and wind tolerance. While not a dune grass, Muhlenbergia capillaris tolerates salt air and light salt spray, especially when planted a bit inland from the first line of exposure or paired with a low windbreak. Its narrow leaves flex in coastal winds, reducing tear or lodging.

Wildlife and maintenance benefits. The fall inflorescences provide late-season habitat value—plumes shelter small beneficial insects, and seed heads can feed birds. In winter, the tawny foliage brings structure without the mess of many perennials. Best of all, one annual haircut restores a clean mound for spring.

If your garden battles humidity, poor soils, deer pressure, or intermittent drought, pink muhly is a pragmatic, stylish answer that doesn’t require constant intervention.


Planting Pink Muhly: Soil, Sun, and Spacing

Site selection. For best color and the densest plumes, choose full sun—aim for 6–8+ hours daily. Light afternoon shade is acceptable inland, but deep shade reduces flowering. On the coast, prioritize airflow and drainage; low pockets that stay soggy after storms are poor choices.

Soil preparation. Pink muhly is forgiving, but it dislikes “wet feet.” In sandy or sandy-loam soils, preparation is often as simple as loosening the planting area 8–10 inches deep and raking out construction debris. In heavier spots or flat lots, raise the bed 3–6 inches with a mineral-rich mix (coarse sand + fine gravel + composted pine bark). Avoid peat-heavy mixes that hold water; instead, think “fast in, fast out.”

Planting steps (condensed):

  1. Dig a hole as deep as the root ball and 2× as wide.

  2. Set the crown level with the surrounding soil (never buried).

  3. Backfill and water to settle, removing air pockets without compacting the soil.

  4. Mulch 1–2 inches with pine straw or shredded bark, keeping mulch off the crown.

Spacing. For stand-alone accents, use 30–36 inches center-to-center. For sweeping drifts along drives or walk edges, 24–30 inches creates a seamless mass in 2–3 seasons. Give plants a 12–18 inch buffer from hard edges so arching plumes don’t obstruct view lines.

Container culture. In coastal towns and patios, pink muhly shines in 24–30 inch wide containers with large drainage holes. Use a gritty container mix (pine bark fines + perlite + a small amount of compost). Containers dry faster in summer winds, so monitor moisture the first year.

Cultivar notes. Classic species plantings deliver the most natural look. Selected forms like ‘White Cloud’ (creamy plumes) broaden design options, while compact selections suit narrow borders. Regardless of choice, your cultural care is identical: sun, drainage, restraint with water and fertilizer.


Watering, Fertilizing, and Seasonal Maintenance

Watering. The first season is about root establishment. Water deeply but infrequently: soak the root zone, let the top few inches of soil dry, then repeat. In sandy soils during summer, that may mean 1–2 deep waterings per week for 6–10 weeks after planting. Once established, aim to withhold irrigation unless there is a prolonged drought; too much water leads to flopping and weak growth.

Fertilizing. Resist the urge to push growth. Over-fertilizing produces lush leaves at the expense of flowers, and can make clumps splay. If your soil is extremely poor, scratch in a light, slow-release, balanced fertilizer in early spring (a small handful per mature clump), or top-dress with composted pine bark to feed soil biology rather than the plant directly. Coastal sands benefit from micronutrient replenishment; a once-yearly light application is ample.

Cutback timing. Leave the plumes standing through winter for beauty and habitat. Perform the annual cutback in late winter (Zones 8–9: late February to early March), before new growth emerges. Use shears to reduce the clump to 6–8 inches. Cutting earlier can spoil winter interest; cutting later risks nicking new shoots.

Dividing and renewal. Every 3–4 years, if the center becomes thin or the clump outgrows its space, divide in late winter. Slice the root mass into halves or thirds, replant the most vigorous portions at original depth, and water to settle. Division refreshes bloom and keeps drifts uniform.

Staking and grooming. Healthy muhly rarely needs staking. If an unusually wet autumn causes flopping, a discrete, low ring support can lift plumes without visual clutter. Through the season, remove any spent seed heads that lean into walkways; otherwise, let the plant express its natural form.

Seasonal maintenance calendar (Zones 8–9)

Season Tasks
Late Winter (Feb–Mar) Cut back to 6–8 in, divide crowded clumps, top-dress with composted pine bark if soil is very lean.
Spring (Mar–May) Water to establish new plantings; check drainage after heavy rains; avoid heavy fertilization.
Summer (Jun–Aug) Deep, infrequent watering during drought; weed lightly; monitor for heat stress in containers.
Fall (Sep–Nov) Enjoy plumes; no pruning; optional light staking after storms.
Early Winter (Dec–Jan) Leave plumes for structure and wildlife; plan divisions for late winter if needed.

Troubleshooting: Pests, Diseases, and Common Mistakes

Pests and diseases. One of muhly’s selling points is its natural resistance. In coastal gardens, pest issues are rare. Occasional leaf spot can appear in persistently wet, crowded plantings, a sign that airflow and drainage need improving. Avoid overhead irrigation late in the day. If a container specimen sulks, suspect poor drainage or soil that stays saturated; repot into a grittier mix and reduce watering frequency.

Salt and storm exposure. Pink muhly handles salt air better than many ornamentals, but direct oceanfront blast zones can scorch leaf tips. Solutions include planting one garden “row” inland behind a low hedge (yaupon holly or wax myrtle) or placing muhly on the leeward side of structures. After tropical systems, rinse foliage with fresh water once winds subside to wash off salt residue—only if drainage is excellent.

Sun and bloom. Sparse plumes usually trace back to insufficient sun or excess nitrogen. Move shaded clumps to brighter spots in winter or thin overhanging branches. Reduce fertilization the following spring.

Flop and form. Flopping indicates overwatering, excess fertility, or planting too close. Open spacing and lean soil restore the upright vase shape. If you must correct a mature drift, divide and replant at 24–30 inch spacing to reset structure.

Weeds and encroachment. In the first year, light hand-weeding is enough. A thin 1–2 inch pine-straw mulch suppresses annual weeds without trapping moisture at the crown. Avoid thick, water-holding mulches that encroach on the plant base.

Cold snaps. In northern edges of Zone 8, sudden Arctic fronts can scorch foliage; the plant typically rebounds from the crown. Do not cut back immediately after a freeze—wait until late winter to remove browned leaves so the plant keeps its cold buffer.

Categories
Blog

How to Grow Southern Magnolia Trees: Expert Care Tips

Southern magnolia trees (Magnolia grandiflora) represent the epitome of Southern elegance, featuring glossy evergreen foliage and spectacular fragrant white blooms. These magnificent native trees thrive in USDA zones 7-10, requiring specific care techniques to reach their full potential of 60-80 feet tall with proper Southern magnolia tree care practices, including strategic planting, consistent watering, and appropriate pruning methods.

Table of Contents

  1. Understanding Southern Magnolia Characteristics
  2. Optimal Planting Conditions and Site Selection
  3. Essential Care and Maintenance Requirements
  4. Common Problems and Effective Solutions
  5. Popular Southern Magnolia Varieties
  6. Landscaping Applications and Design Ideas

Understanding Southern Magnolia Characteristics

Southern magnolia trees stand as one of the Southeast’s most iconic native species, naturally occurring from North Carolina to Florida and west to Texas. These evergreen giants have adapted to the region’s hot, humid summers and mild winters over thousands of years, making them exceptionally well-suited for southeastern landscapes.

Physical Characteristics and Growth Pattern

Magnolia grandiflora typically reaches 60-80 feet in height with a 30-40 foot spread when mature, though growth rates vary significantly by variety and growing conditions. Young trees grow relatively quickly, adding 12-24 inches annually during their first decade, then slowing to a more moderate 6-12 inches per year as they mature.

The tree’s most distinctive feature is its large, leathery leaves, which measure 5-10 inches long and 2-4 inches wide. The upper leaf surface is glossy dark green, while the underside often shows a rusty-brown felt-like coating called indumentum. This unique leaf structure helps the tree conserve moisture during hot, dry periods.

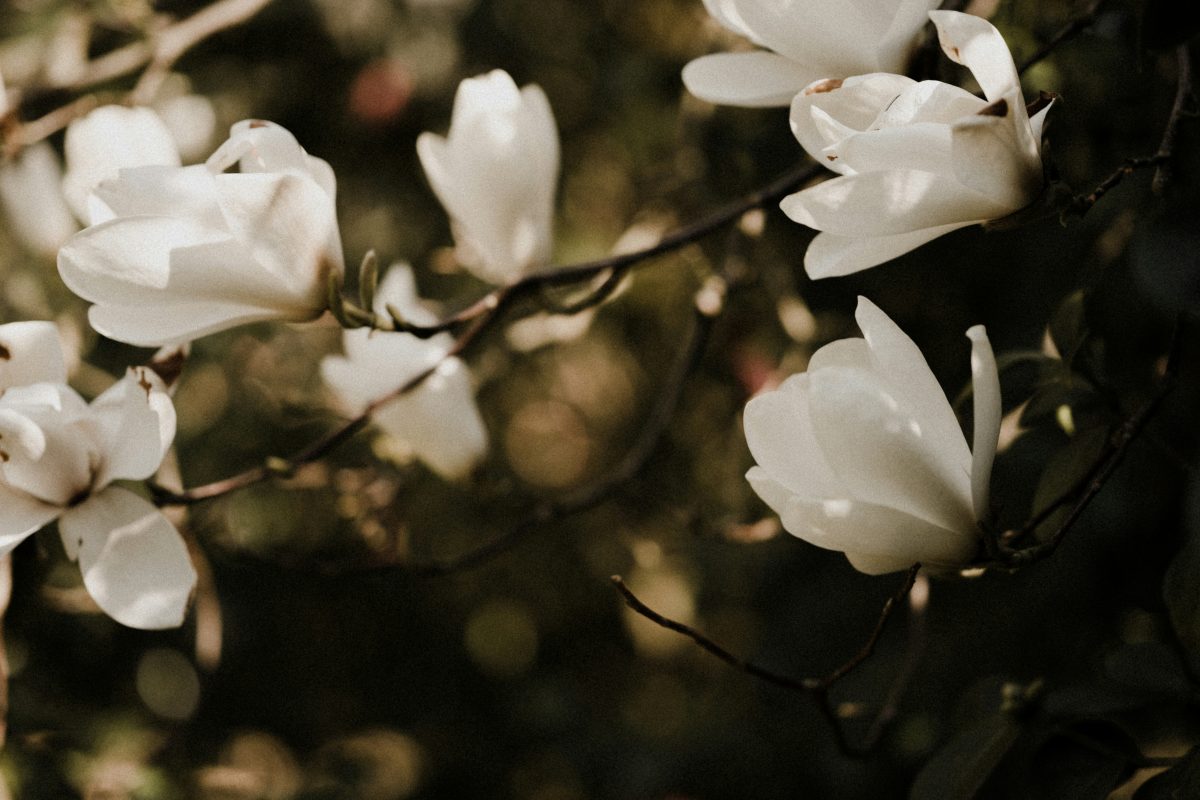
Southern magnolia flowers represent one of nature’s most spectacular displays. When fully opened, they measure 8-12 inches across. These creamy white, intensely fragrant flowers typically appear from late spring through early summer, with some varieties producing sporadic blooms throughout the growing season.

Root System and Soil Preferences

Southern magnolias develop shallow, fleshy root systems that spread widely but rarely extend deeply into the soil. This root structure makes them somewhat susceptible to drought stress but also allows them to quickly absorb surface moisture from rain or irrigation.

The tree’s root system contains specialized structures called contractile roots that help anchor the tree and can actually pull the trunk slightly deeper into the ground over time. These roots are particularly sensitive to soil compaction and mechanical damage, requiring careful handling during planting and landscape maintenance.

Climate Adaptations and Hardiness

These native trees have evolved remarkable adaptations to southeastern climate conditions. Their waxy leaf coating reduces moisture loss during hot summers, while their evergreen nature provides year-round photosynthesis capability. Once established, southern magnolias can tolerate brief temperature drops to 5-10°F, though young trees may need winter protection in zone 7 locations.

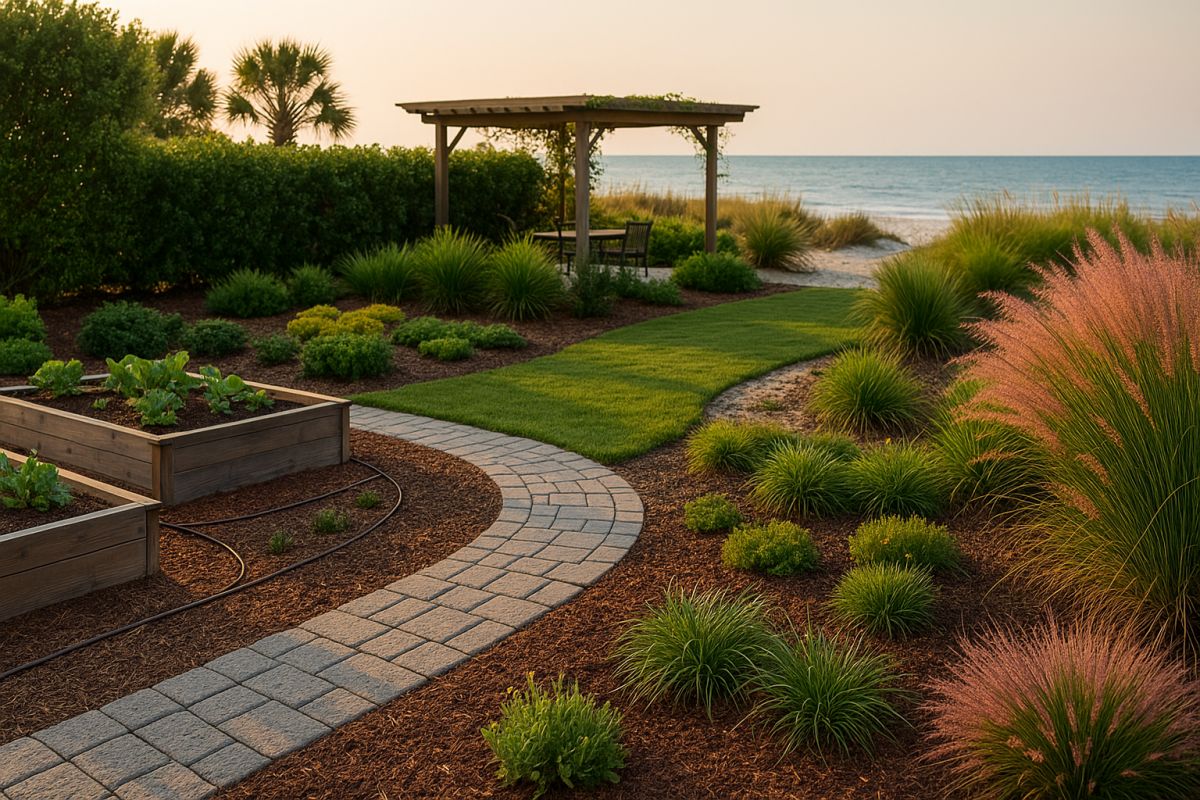
The trees show good salt tolerance, making them suitable for coastal planting situations, though they perform best when protected from direct salt spray. This adaptation allows successful cultivation within several miles of saltwater coastlines throughout the southeastern United States.

Optimal Planting Conditions and Site Selection

Successful Southern magnolia establishment begins with careful site selection and proper planting techniques. These trees require specific conditions to thrive and can struggle or fail in unsuitable locations.

Site Requirements and Spacing Considerations

Southern magnolias need full sun to partial shade exposure, with at least 6 hours of direct sunlight daily for optimal flowering and growth. While they can tolerate some shade, particularly afternoon shade in extremely hot climates, insufficient light results in poor flowering and weak, stretched growth.

Proper spacing is critical for long-term success. Plant trees at least 20-30 feet from structures, considering their eventual 30-40 foot spread. When planting multiple trees, space them 40-50 feet apart to prevent overcrowding and competition for resources.

Avoid planting near septic systems, underground utilities, or areas where the extensive surface root system might cause future problems. If planted too close, the shallow roots can potentially damage sidewalks, driveways, and building foundations.

Soil Preparation and Amendment Guidelines

Southern magnolias prefer well-drained, slightly acidic soil with a pH between 5.5 and 6.5, though they can tolerate slightly alkaline conditions up to pH 7.5. Conduct a soil test before planting to determine pH and nutrient levels, allowing for appropriate amendments.

Soil Preparation Steps:

  1. Test soil pH and drainage by digging a hole 18 inches deep
  2. Amend heavy clay soils with coarse sand or perlite (never fine sand)
  3. Add organic matter like compost or aged pine bark to improve structure
  4. Ensure the planting area drains within 24 hours after heavy rain
  5. Create raised planting beds in poorly drained locations

The planting hole should be 2-3 times wider than the root ball but no deeper. Southern magnolias should be planted at the same depth they were growing in the nursery, with the root flare slightly above soil level to prevent settling issues.

Optimal Planting Timing and Techniques

Fall planting (October through December) provides the best establishment success in most southeastern locations. This timing allows root development during cool, moist conditions before the stress of summer heat. Spring planting is also acceptable but requires more careful attention to watering during the first growing season.

Proper Planting Technique:

  1. Dig a hole 2-3 times wider than the root ball
  2. Set the tree at the proper depth with the root flare exposed
  3. Backfill with native soil mixed with 25% compost
  4. Water thoroughly to eliminate air pockets
  5. Apply a 2-3 inch mulch layer, keeping mulch away from the trunk
  6. Stake only if necessary, removing stakes after one year

Avoid disturbing the root ball excessively during planting, as magnolia roots are particularly sensitive to damage. Container-grown trees should have circling roots carefully loosened or cut to prevent girdling.

Essential Care and Maintenance Requirements

Proper Southern magnolia tree care involves consistent attention to watering, fertilization, pruning, and general maintenance practices that support healthy growth and flowering.

Watering Requirements and Irrigation Strategies

Newly planted Southern magnolias require regular, deep watering for the first 2-3 years until their root systems become established. During this period, provide 1-2 inches of water weekly, adjusting for rainfall and seasonal conditions.

Effective Watering Practices:

  • Deep, infrequent watering rather than frequent shallow irrigation
  • Soaker hoses or drip irrigation systems work best for consistent moisture
  • Morning watering reduces disease pressure and water loss to evaporation
  • Mulching around the tree helps retain soil moisture and reduce watering needs
  • Seasonal adjustments with increased watering during hot, dry periods

Established trees (3+ years) typically require supplemental irrigation only during extended drought periods. However, consistent soil moisture produces the best flowering and growth rates, particularly during the spring growing season.

Monitor soil moisture by checking 2-3 inches deep around the root zone. Soil should feel slightly moist but not waterlogged. Overwatering can be as damaging as drought stress, leading to root rot and other problems.

Fertilization Programs and Nutrient Management

Southern magnolias benefit from annual fertilization but should not be over-fertilized, which can reduce flowering and increase disease susceptibility. Use a balanced, slow-release fertilizer specifically formulated for acid-loving plants.

Fertilizer Component Purpose Application Rate Timing
Nitrogen (N) Foliage growth and color 1 lb per inch trunk diameter Early spring
Phosphorus (P) Root development and flowering 0.5 lb per inch trunk diameter Fall application
Potassium (K) Disease resistance and winter hardiness 1 lb per inch trunk diameter Split spring/fall
Iron (Fe) Chlorophyll production As needed for chlorosis Spring/early summer

Apply fertilizer in a circle extending from 3 feet from the trunk to the drip line, watering thoroughly after application. Organic alternatives like composted pine bark or aged manure can provide slower nutrient release and improve soil structure.

Avoid high-nitrogen fertilizers late in the growing season, as this can stimulate tender growth susceptible to winter damage. Fall fertilization should focus on phosphorus and potassium to promote root growth and cold hardiness.

Pruning Guidelines and Timing

Southern magnolias require minimal pruning when properly sited and allowed to develop their natural form. However, some pruning may be necessary for safety, health, or aesthetic reasons.

Best Practices for Magnolia Pruning:

  • Time pruning carefully – immediately after flowering (June-July) to avoid removing next year’s flower buds
  • Use proper tools – sharp, clean pruning shears and saws to prevent disease transmission
  • Make proper cuts – just outside the branch collar without leaving stubs
  • Remove dead, diseased, or damaged wood at any time of year
  • Limit pruning amount – never remove more than 25% of the tree’s canopy in one year

Young trees may benefit from light structural pruning to establish a strong central leader and remove competing branches. Lower branches should be removed gradually as the tree matures to achieve the desired clearance heights.

Avoid significant pruning cuts on established trees, as magnolias heal slowly and large wounds can become entry points for diseases and insects. When major pruning is necessary, hire certified arborists familiar with magnolia care requirements.

Common Problems and Effective Solutions

Southern magnolia trees can experience various problems related to environmental stress, diseases, and pests. Early identification and appropriate treatment ensure long-term tree health and vitality.

Environmental Stress Issues

Leaf Drop and Yellowing: Southern magnolias naturally shed older leaves throughout the growing season, but excessive leaf drop may indicate stress. Common causes include drought, overwatering, soil compaction, or root damage from construction activities.

Solution Approach: Evaluate watering practices, improve soil drainage if necessary, and avoid soil compaction around the root zone. Apply 2-3 inches of organic mulch to conserve moisture and protect surface roots.

Poor Flowering: Insufficient sunlight, over-fertilization with nitrogen, or drought stress can reduce flower production. Trees younger than 10-15 years may also flower sparsely as they mature.

Corrective Measures: Ensure adequate sunlight exposure, reduce nitrogen fertilization, and maintain consistent soil moisture during the spring growing season. Patience is often required as young trees develop flowering capacity.

Chlorosis (Yellow Leaves with Green Veins): This condition typically indicates iron deficiency caused by alkaline soil pH or poor drainage. It’s particularly common in clay soils or areas with high pH.

Disease Management and Prevention

Leaf Spot Diseases: Various fungal organisms can cause brown or black spots on magnolia leaves, particularly during humid conditions with poor air circulation.

Treatment Protocol:

  • Remove affected leaves and dispose of them in the trash (not compost)
  • Improve air circulation through proper spacing and pruning
  • Apply preventive fungicide sprays during wet springs if necessary
  • Avoid overhead watering that keeps foliage wet

Root Rot: Overly wet soil conditions can lead to various root rot diseases that cause tree decline and potential death. Symptoms include yellowing leaves, poor growth, and branch dieback.

Prevention and Management: Ensure proper drainage before planting, avoid overwatering, and plant in raised beds if drainage is questionable. Affected trees may require professional evaluation and treatment.

Pest Management Strategies

Scale Insects: These small, immobile insects attach to leaves and stems, sucking plant juices and weakening the tree. Heavy infestations can cause leaf yellowing and premature drop.

Control Methods:

  • Monitor regularly for early detection
  • Apply horticultural oil sprays during the crawler stage (late spring)
  • Encourage beneficial insects through diverse plantings
  • Use systemic insecticides for severe infestations

Magnolia Borer: The larvae of this beetle tunnel into tree trunks and branches, potentially causing significant damage or death to stressed trees.

Prevention Strategy: Maintain tree health through proper watering, fertilization, and avoiding mechanical damage to trunks. Remove and destroy infested branches when discovered.

Popular Southern Magnolia Varieties

Modern plant breeding has produced numerous Southern magnolia varieties offering different characteristics for specific landscape needs and growing conditions.

Compact and Dwarf Varieties

‘Kay Parris’ represents one of the most popular compact selections, reaching only 20-25 feet tall with a narrow, upright growth habit. This variety produces large, fragrant flowers on young trees and works well in smaller landscapes or urban environments.

‘Teddy Bear’ features distinctive brown, fuzzy leaf undersides and compact growth reaching 15-20 feet tall. The smaller leaves and dense branching pattern make it suitable for container growing or small spaces.

‘Susan’ offers a unique combination of compact size (12-15 feet) with large flowers that appear at a young age. This variety tolerates cooler temperatures better than most Southern magnolias.

Fast-Growing and Large Varieties

‘Majestic Beauty’ grows rapidly to 35-50 feet tall with a pyramidal shape and produces flowers on young trees. The glossy, dark green leaves show less brown on the undersides than typical varieties.

‘D.D. Blanchard’ demonstrates exceptional cold hardiness and features distinctive bronze-colored leaf undersides. This variety grows 50-60 feet tall and produces abundant, large flowers.

‘Bracken’s Brown Beauty’ combines fast growth with compact size (30-40 feet) and produces flowers at a young age. The brown leaf undersides provide attractive contrast to the dark green upper surfaces.

Specialty and Unique Varieties

‘Little Gem’ revolutionized Southern magnolia use with its dwarf size (15-20 feet), extended flowering period, and suitability for containers. This variety produces flowers almost continuously from spring through fall.

‘Claudia Wannamaker’ offers excellent performance in challenging conditions including alkaline soils and urban environments. This variety features large flowers and good disease resistance.

‘Hasse’ produces particularly large flowers (up to 14 inches across) and demonstrates good heat tolerance for extreme southern conditions. The tree reaches 40-50 feet with a broad, spreading canopy.

Landscaping Applications and Design Ideas

Southern magnolias serve multiple roles in landscape design, from specimen trees to screening plants. They require thoughtful placement to maximize their ornamental impact and functional benefits.

Specimen Tree Placement and Design

As specimen trees, Southern magnolias work best in large, open areas where their natural form and size can be fully appreciated. Position them as focal points in front yards, courtyards, or large garden spaces where the fragrant flowers can be enjoyed from outdoor living areas.

When placing specimen trees, consider sight lines from windows and outdoor seating areas. The best locations allow viewing of both the impressive canopy and the spectacular flowers duringthe  blooming season.

Underplant specimen magnolias with shade-tolerant groundcovers or small shrubs that complement the tree’s elegant character. Avoid high-maintenance plantings that require frequent cultivation around the sensitive surface roots.

Privacy Screening and Property Boundaries

Larger Southern magnolia varieties create excellent privacy screens when planted 20-25 feet apart. Their evergreen foliage provides year-round screening while their eventual size creates substantial visual barriers.

For faster screening effects, consider combining Southern magnolias with faster-growing evergreen trees like Southern live oak or bald cypress, gradually removing the temporary trees as magnolias mature.

Effective Screening Strategies:

  • Stagger plantings at different distances from property lines for a natural appearance
  • Mix varieties with different mature sizes for a layered screening effect
  • Consider maintenance access when planning screen plantings
  • Plan for utility lines and future access needs

Integration with Native Plant Communities

Southern magnolias work exceptionally well in native plant landscapes, naturally complementing other southeastern natives like dogwood, redbud, and native azaleas. This approach creates ecologically balanced gardens that support local wildlife while requiring minimal maintenance.

Combine magnolias with native understory plants such as wild ginger, coral bells, and native ferns that thrive in the dappled shade created by the magnolia canopy. This layered planting approach mimics natural forest communities and provides habitat for birds and beneficial insects.

Southern magnolias’ shallow root system makes them compatible with many native wildflowers and groundcovers that don’t require deep soil cultivation. This characteristic allows for diverse, naturalistic plantings that change with the seasons.

Urban and Commercial Applications

Compact Southern magnolia varieties like ‘Little Gem’ and ‘Kay Parris’ work well in urban environments where space constraints limit the use of full-sized varieties. These selections tolerate urban stresses, including air pollution, reflected heat, and compacted soils, better than many alternative trees.

For commercial landscapes, Southern magnolias provide low-maintenance, drought-tolerant options that create an impressive visual impact with minimal ongoing care requirements. Their evergreen nature ensures year-round aesthetic value in corporate and institutional settings.

Consider seasonal maintenance requirements when using magnolias in commercial applications. The natural leaf drop and occasional flower debris may require more frequent cleanup in high-visibility areas.

Categories
Blog

Best Native Plants for Southeast Gardens: A Complete Growing Guide

Native plants for southeast gardens offer unmatched resilience, requiring minimal maintenance while supporting local wildlife and thriving in the region’s unique climate conditions. These plants have evolved over thousands of years to handle the southeastern United States’ hot summers, variable rainfall, and specific soil conditions, making them ideal choices for sustainable landscaping from Virginia to Florida.

Table of Contents

  1. Why Choose Native Plants for Southeast Gardens
  2. Understanding Southeast Garden Zones and Climate
  3. Top Native Trees and Shrubs for Southeast Gardens
  4. Best Native Perennials and Wildflowers
  5. Creating a Successful Native Plant Garden

Why Choose Native Plants for Southeast Gardens

The southeastern United States presents unique gardening challenges that make native plants particularly valuable. From the coastal plains of Georgia to the piedmont regions of North Carolina, gardeners face intense summer heat, unpredictable rainfall patterns, and diverse soil conditions ranging from sandy coastal soils to heavy clay.

Environmental Benefits of Native Plants

Native plants for southeast gardens provide crucial ecosystem services that non-native species simply cannot match. They serve as host plants for native butterflies and moths, with research showing that native plants support 35 times more caterpillar species than non-native plants. This translates directly to more food for birds, as a single clutch of chickadees requires 6,000-9,000 caterpillars to successfully fledge.

Practical Gardening Advantages

Once established, southeastern native plants demonstrate remarkable drought tolerance and disease resistance. They require significantly less water, fertilizer, and pest control than traditional landscape plants. For example, native Southern magnolia trees can survive extended drought periods that would stress or kill many ornamental alternatives.

Cost-Effective Landscaping

The long-term economic benefits of native plant landscaping are substantial. Reduced water bills, minimal fertilizer needs, and lower maintenance requirements create significant savings. Many native plants also self-seed, providing free replacements and expansion opportunities for your garden.

Understanding Southeast Garden Zones and Climate

The southeastern United States encompasses USDA Hardiness Zones 7a through 10b, each presenting distinct growing conditions that influence native plant selection. Understanding your specific microclimate ensures successful plant establishment and long-term garden health.

Coastal Southeast Conditions (Zones 8b-10b)

Coastal areas from the Outer Banks to South Florida experience mild winters, high humidity, and salt exposure. Native plants like Southern live oak (Quercus virginiana) and coontie (Zamia integrifolia) have evolved salt tolerance mechanisms that allow them to thrive in these challenging conditions.

Piedmont and Inland Regions (Zones 7a-8a)

Inland areas experience greater temperature fluctuations and typically receive more consistent rainfall. This climate favors native plants like Eastern redbud (Cercis canadensis) and wild bergamot (Monarda fistulosa), which require winter chill hours and benefit from seasonal temperature variations.

Rainfall and Soil Considerations

Most southeastern regions receive 40-60 inches of annual rainfall, but distribution varies dramatically by season. Native plants have adapted to this pattern, with many species entering dormancy during hot, dry summer periods and resuming active growth during cooler, wetter months.

Native Plant Zone Comparison

Zone Temperature Range Best Native Trees Ideal Perennials Special Considerations
7a-7b 0°F to 10°F Tulip poplar, Red maple Wild ginger, Coral bells Winter protection needed
8a-8b 10°F to 20°F Southern magnolia, Bald cypress Carolina jessamine, Spiderwort Moderate winter prep
9a-9b 20°F to 30°F Live oak, Cabbage palm Firebush, Wild coffee Heat stress management
10a-10b 30°F to 40°F Gumbo limbo, Simpson’s stopper Beach sunflower, Railroad vine Salt tolerance crucial

Top Native Trees and Shrubs for Southeast Gardens

Selecting appropriate native trees and shrubs forms the backbone of successful southeastern landscaping. These woody plants provide structure, wildlife habitat, and year-round interest while requiring minimal intervention once established.

Canopy Trees for Southeast Gardens

Southern live oak (Quercus virginiana) stands as the quintessential southeastern native tree, providing massive shade canopies and supporting over 500 species of butterflies and moths. These majestic trees tolerate both drought and flooding, making them ideal for variable southeastern weather patterns.

Bald cypress (Taxodium distichum) offers unique characteristics for wet areas, thriving in everything from standing water to moderately dry conditions. Its distinctive buttressed trunk and needle-like leaves create architectural interest, while its deciduous nature provides winter light penetration.

Tulip poplar (Liriodendron tulipifera) rapidly reaches impressive heights in zones 7-8, producing distinctive tulip-shaped flowers and supporting numerous butterfly species. This native provides excellent shade and fall color while preferring well-drained, slightly acidic soils common throughout the region.

Native Shrubs for Structure and Wildlife

Beautyberry (Callicarpa americana) produces spectacular purple berries that feed over 40 bird species while tolerating diverse soil conditions. This adaptable shrub handles both sun and partial shade, making it perfect for transitional garden areas.

Spicebush (Lindera benzoin) serves as the primary host plant for spicebush swallowtail butterflies while producing aromatic foliage and bright yellow fall color. Female plants produce red berries that attract migrating birds, particularly valuable during fall migration periods.

Oakleaf hydrangea (Hydrangea quercifolia) combines spectacular white flower clusters with distinctive oak-shaped leaves that turn brilliant red in fall. This southeastern native thrives in partial shade and provides extended seasonal interest from spring blooms through winter’s exfoliating bark.

Best Native Perennials and Wildflowers

Native perennials form the foundation of sustainable southeastern gardens, providing continuous blooms, supporting pollinators, and requiring minimal maintenance once established. These plants have evolved specific adaptations to handle the region’s climate extremes.

Spring-Blooming Native Perennials

Wild ginger (Asarum canadense) creates lush groundcover in shaded areas, producing unusual burgundy flowers hidden beneath heart-shaped leaves. This native spreads slowly through rhizomes, eventually forming dense mats that suppress weeds while requiring no supplemental irrigation.

Coral bells (Heuchera americana) produce delicate flower spikes above colorful foliage that ranges from deep burgundy to bright lime green. These versatile natives adapt to various light conditions and provide year-round foliage interest, particularly valuable in winter when many perennials disappear.

Wild columbine (Aquilegia canadensis) produces distinctive red and yellow flowers that attract hummingbirds and long-tongued butterflies. This short-lived perennial readily self-seeds, ensuring continuous presence while requiring minimal garden space.

Summer and Fall Native Bloomers

Purple coneflower (Echinacea purpurea) produces large, daisy-like flowers from summer through fall, attracting butterflies during blooming and providing seeds for goldfinches and other birds. This drought-tolerant native handles clay soils and established plants rarely require supplemental watering.

Wild bergamot (Monarda fistulosa) creates clouds of tubular flowers that attract bees, butterflies, and hummingbirds throughout summer. The aromatic foliage has historically been used for tea, and the plants form spreading colonies that naturalize beautifully in informal garden settings.

New England aster (Symphyotrichum novae-angliae) provides crucial late-season nectar when few other plants are blooming, supporting monarch butterflies during their southern migration. These tall natives produce masses of purple flowers and adapt to various soil moisture levels.

Groundcover and Spreading Natives

Wild strawberry (Fragaria virginiana) produces small white flowers followed by tiny, intensely flavored berries. This low-growing native spreads through runners, creating dense mats that work well under trees or in naturalized areas.

Partridgeberry (Mitchella repens) forms evergreen mats studded with small white flowers and bright red berries that persist through winter. This shade-loving native requires acidic soil and consistent moisture but provides year-round groundcover in woodland settings.

Creating a Successful Native Plant Garden

Establishing a thriving native plant garden requires understanding natural plant communities and recreating appropriate growing conditions. Successful southeastern native gardens mimic the region’s natural ecosystems while providing practical landscape solutions.

Site Preparation and Soil Management

Most southeastern native plants prefer well-drained soils with moderate fertility. Avoid over-amending native plant beds, as many species have evolved to thrive in relatively poor soils and may become too vigorous or susceptible to disease in highly fertile conditions.

Test soil pH before planting, as southeastern natives span a range of preferences from the acidic conditions preferred by mountain laurel (Kalmia latifolia) to the slightly alkaline soils tolerated by Eastern red cedar (Juniperus virginiana).

Planting Timing and Techniques

Fall planting proves most successful for southeastern native plants, allowing root establishment during cool, moist conditions before summer stress. Plant native trees and shrubs from October through February, while perennials can be planted from September through March.

Water newly planted natives regularly during their first growing season, then gradually reduce supplemental irrigation as plants establish. Most southeastern natives require minimal watering once established, but initial establishment watering remains crucial for long-term success.

Design Principles for Native Plant Gardens

Create plant communities that mirror natural southeastern ecosystems. Combine canopy trees, understory shrubs, and groundcover plants in proportions similar to local forests. This layered approach maximizes wildlife habitat while creating visually appealing landscapes.

Consider bloom succession when selecting plants, ensuring continuous flowers from early spring through late fall. Early bloomers like serviceberry (Amelanchier canadensis) support emerging pollinators, while late bloomers like aromatic aster (Symphyotrichum oblongifolium) provide crucial fall nectar sources.

Maintenance and Long-term Care

Native plant gardens require different maintenance approaches than traditional landscapes. Avoid excessive fertilization, which can promote disease and reduce flowering. Instead, focus on appropriate plant placement and minimal intervention management.

Allow natural plant cycles, including die-back of perennial foliage that provides winter habitat for beneficial insects. Cut back perennials in late winter rather than fall, leaving seed heads for birds and stems for overwintering insects.

Common Challenges and Solutions

Invasive plant competition poses the greatest threat to southeastern native plant gardens. Monitor regularly for aggressive non-natives like Japanese honeysuckle (Lonicera japonica) and English ivy (Hedera helix), removing them promptly to prevent establishment.

Deer browsing can impact certain native plants, particularly in suburban areas. Select deer-resistant natives like aromatic herbs (wild bergamot, spicebush) or protect vulnerable plants during establishment periods.

Young native plant gardens may appear sparse initially, but patience pays dividends as plants mature and self-seed. Resist the urge to over-plant; instead, allow natural spacing and gradual establishment that mimics wild plant communities.

Creating successful native plant gardens in the Southeast requires understanding regional growing conditions, selecting appropriate species, and embracing natural ecosystem processes. These gardens provide unmatched environmental benefits while creating beautiful, low-maintenance landscapes that celebrate the unique character of southeastern flora. With proper planning and plant selection, native gardens become increasingly beautiful and wildlife-rich over time, providing lasting value for both gardeners and local ecosystems.

Categories
Blog

Salt-Tolerant Landscaping for Coastal Yards

Salt-tolerant landscaping in Zones 8–9 means matching plants and design to wind, heat, salty air, and sandy soils. Use exposure-based zoning, resilient trees and shrubs, and soil/irrigation practices that flush salts and anchor roots. With the right palette and layout, coastal yards stay lush without constant repair.

Table of Contents

  1. Coastal Stressors and the Salt-Spray Gradient

  2. Design Principles That Beat Salt and Wind

  3. Plant Selection by Exposure Zone (with table)

  4. Soil, Irrigation, and Fertility in Saline Sands

  5. Installation & Maintenance for Long-Term Resilience

Coastal Stressors and the Salt-Spray Gradient

Key idea: Treat your yard as zones of exposure—frontline, mid-zone, and protected—and place plants where they can genuinely survive.

Coastal gardens live under a unique cocktail of stress: airborne salt spray, onshore winds, high humidity and heat, and fast-draining sandy soils. Salt injury shows up as leaf scorch, burned margins, stunting, and twig dieback; winds compound damage by tearing foliage and desiccating tissue. The exact property can include pockets of safety—behind a dune, wall, or hedge—where salt concentration drops dramatically.

Think in gradients:

  • Frontline (salt-spray alley): Areas facing open water or prevailing winds. Plants here must tolerate direct spray and abrasive wind. Hardscape and structural evergreens do the heavy lifting.

  • Mid-zone (filtered exposure): Salt arrives at lower doses behind a fence, hedge, or building corner. Many shrubs and bold-leaf perennials succeed here.

  • Protected (interior/backyard/microclimates): Wind is slowed and salt is diluted; you can use moderately tolerant species and even a few “tropical look” plants in Zone 8–9.

Microclimates matter. A south-facing masonry wall stores heat and blocks wind; a slight rise or berm deflects salt-laden surface water; even a porch can create a pocket where tender foliage remains unburned. Map these patterns before you buy plants; placement beats brute force.

Design Principles That Beat Salt and Wind

Key idea: Shape the site to slow wind, intercept salt, and shed it quickly; then layer plants to reinforce that protection.

Use layered windbreaks. A staggered mix of salt-tough evergreens at the property edge—think Southern red cedar (Juniperus virginiana var. silicicola), wax myrtle (Morella cerifera), and yaupon holly (Ilex vomitoria)—slows wind without creating a solid wall that tunnels gusts. Permeable screens reduce wind speed more effectively than solid fences, and they let salt settle before it reaches sensitive zones.

Design for drainage and rinse-off. Slightly crowned planting beds, gentle swales that move stormwater off roots, and drip-line emitters that deliver deep, occasional leaching help salts move below the root zone. In patios and pathways, choose permeable surfaces—shell fines, crushed stone, or open-joint pavers—so salty water doesn’t puddle around trunks.

Choose resilient structures. Treated wood, composite decking, marine-grade metals, and UV-stable plastics tolerate salt air and prolong the life of trellises and raised beds. Position hardscape to double as protection: low walls and seat-height planters blunt wind while creating warm niches for mid-zone species.

Plant in layers. Frontline: low, dense groundcovers and mounding shrubs absorb spray; mid-story screens filter wind; taller trees sit leeward, where gusts have been slowed. This “green armor” lets you grow more diverse plants inside the yard than at the edge.

Plant Selection by Exposure Zone (with table)

Key idea: Match species to exposure and soil, not just USDA zone; prioritize proven coastal performers first, then add accent plants behind them.

Below is a concise table of reliable choices for Zones 8–9. “Frontline” indicates high tolerance to salt spray and wind; “Mid-zone” handles filtered exposure; “Protected” suits interior pockets. (Cultivar hardiness varies—select locally proven forms.)

Exposure Zone Plant (Common Name) Type USDA Zone Salt Tolerance Notes
Frontline Sabal palmetto (Cabbage palm) Tree 8b–11 High Iconic coastal palm; tough fronds, excellent wind resistance.
Frontline Juniperus v. silicicola (Southern red cedar) Tree 8–10 High Narrow footprint; great windbreak and wildlife value.
Frontline Ilex vomitoria (Yaupon holly) Shrub/Small tree 7–10 High Forms dense screens; dwarf cultivars for hedging.
Frontline Morella cerifera (Wax myrtle) Shrub 7–10 High Fast, fragrant foliage; tolerates wet or dry sands.
Frontline Serenoa repens (Saw palmetto) Shrub 8–11 High Spreading, trunkless palm; green or silver forms.
Frontline Yucca aloifolia (Spanish bayonet) Shrub 8–11 High Architectural spines; use away from paths.
Frontline Helianthus debilis (Beach sunflower) Perennial 8–11 High Blooms in heat; self-seeds lightly.
Mid-zone Ilex cornuta ‘Burfordii’ (Burford holly) Shrub 7–9 Moderate-High Dense hedge; tolerates pruning.
Mid-zone Nerium oleander (Oleander) Shrub 8–11 High Extremely tolerant; note toxicity—site responsibly.
Mid-zone Pittosporum tobira (Mock orange) Shrub 8–10 Moderate-High Glossy leaves; sweet spring fragrance.
Mid-zone Vitex agnus-castus (Chaste tree) Small tree 7–9 Moderate Summer flowers; good in sandy, dry spots.
Mid-zone Muhlenbergia capillaris (Pink muhly grass) Grass 7–10 Moderate Airy pink plumes; drought tolerant.
Mid-zone Lantana camara (Lantana) Subshrub 8b–11 High Flowers through heat; choose sterile selections if available.
Protected Magnolia grandiflora (Southern magnolia) Tree 7–10 Moderate Place leeward; tolerates humidity, dislikes direct spray.
Protected Trachycarpus fortunei (Windmill palm) Tree 7–10 Moderate Good cold tolerance; moderate salt tolerance.
Protected Zamia integrifolia (Coontie) Cycad 8b–11 Moderate-High Pest-resistant, drought tolerant; great in dry shade.
Protected Arachis glabrata (Ornamental peanut) Groundcover 8b–11 Moderate Low, nitrogen-fixing, foot-tolerant turf alternative.
Protected Trachelospermum asiaticum (Asiatic jasmine) Groundcover 8–10 Moderate Dense, weed-smothering mats in part shade.
Protected Hibiscus moscheutos (Hardy hibiscus) Perennial 5–9 Low-Moderate Big blooms; keep out of direct spray; loves moisture.

How to combine them without over-relying on lists: envision three repeating modules. At the street side, a mixed hedge of Southern red cedar and yaupon hollies forms a permeable screen. Inside that, mounds of wax myrtle and mock orange add body and fragrance. In the leeward patio pocket, accent with windmill palm, coontie, and pink muhly for texture—then stitch the ground plane with ornamental peanut where turf struggles. This layered rhythm creates continuity across the property while respecting exposure limits.

Placement cues within zones

Frontline plants do best when planted densely in staggered rows that break wind at multiple heights. Mid-zone species appreciate morning sun and afternoon protection; place them where salt reaches as a mist, not a blast. Protected species flourish near walls or inside courtyards—use hardscape to bounce light and hold warmth for borderline choices in Zone 8.

Soil, Irrigation, and Fertility in Saline Sands

Key idea: Your soil and watering routine are as important as the plant list; aim to leach salts, build structure, and feed roots slowly.

Build the soil—lightly but consistently. Sandy coastal soils drain fast and hold little nutrition. Work in coarse compost and pine-based mulches at planting to increase water-holding capacity without creating a perched water table. In beds that collect salty runoff, a raised berm of 10–20 cm keeps crowns above the splash zone. Avoid heavy clay imports that trap salts; instead, add biochar or aged bark fines to improve cation exchange capacity so nutrients stick around.

Leach, don’t mist. Irregular light sprinkling concentrates salts near the surface. Instead, deep water is used less often, allowing emitters to run long enough that water moves below the root zone, flushing salts downward. Drip and micro-spray systems excel because they target soil—not foliage—reducing leaf burn. After stormy weeks with heavy salt spray, schedule a deliberate rinse: a thorough overhead watering once conditions calm can wash residues from leaves and mulch.

Fertilize modestly. Use slow-release, polymer-coated blends or organic meals in spring, then top up lightly in midsummer. Rapid soluble feeds risk osmotic stress in salty soils. Monitor pH (many coastal sands skew slightly acidic); adjust with dolomitic lime only if tests show it’s needed. Where reclaimed water is used, shift to extra leaching cycles and favor the toughest frontline species near emitters.

Mulch is armor. A 5–7 cm blanket of shredded bark or pine straw buffers temperature, suppresses weeds, and dilutes salt splash. In humid summers, keep mulch pulled back from trunks and crowns to prevent rot.

Installation & Maintenance for Long-Term Resilience

Key idea: Right season, right cut, right recovery protocol—these three habits prevent most coastal failures.

Best planting windows. In Zone 8, early fall planting lets roots grow into still-warm soil before winter winds; in Zone 9, late fall through early spring is ideal. Palm transplants are best when soils are warm and irrigation is reliable. Water new trees and shrubs deeply for the first 8–12 weeks, then lengthen intervals to encourage deeper rooting.

Pruning that survives storms. Before hurricane season, structural prune young trees to a single dominant leader with well-spaced scaffolds; thin dense hedges slightly so wind can pass through; and remove weakly attached limbs. Avoid late heavy shearing that pushes soft growth right before peak winds. For palms, retain healthy green fronds—“hurricane-cut” palms are weaker, not stronger.

Salt-storm recovery protocol. Once winds ease, hose down foliage to remove crusted salts. Cut back shredded leaves and snapped stems to clean nodes; don’t rush to fertilize. Resume deep-watering cycles for two to three weeks, then reassess. Many coastal species recover quickly once salts are flushed and wounds are clean.

Turf alternatives and edges. Where lawns thin from salt and traffic, switch to ornamental peanut, seashore paspalum (where locally available), or mixed groundcovers backed by a neat paver edge. This reduces irrigation and chemical inputs while keeping paths sand-free.

Safety and siting notes. Oleander is highly toxic, so site away from play areas and never burn prunings. Yucca and Spanish bayonet have sharp tips, so keep well clear of walkways. In narrow side yards, choose soft-textured screens like wax myrtle or pittosporum to avoid snagging passersby.

Wrap-up: Salt-tolerant success on the coast is a design problem first and a plant list second. Zone your yard by exposure, build porous wind filters, and manage water to leach salts. When you put the right species in the right microclimate and maintain it smartly, the result is a yard that looks tropical-lush yet shrugs off salt, heat, and wind.

Categories
Blog

The Coastal-Smart Garden: A Complete Guide for Wind, Salt, Heat and Sand

If you garden anywhere along the Coastal Southeast—from the Carolinas to North Florida—you work with a different rulebook. Wind can shred leaves, salt can sting, heat can shut plants down, and sandy soils can’t hold water or nutrients for long. None of that is a deal-breaker. With a plan tailored to this coast, you can build beds that ride out storms and still look lush by Labor Day. What follows is a detailed, practical playbook you can use immediately.


Read the Site Before You Plant

Start by mapping the forces that shape your garden: microclimates, wind fetch, and salt exposure. The sunniest, hottest pocket is often a south- or west-facing wall where bricks or stucco radiate heat long after dusk. Shaded, wind-protected spots—courtyards, atriums, corners backed by fences—act like half a zone warmer in winter and are where you can push tender, tropical textures.

Salt rarely hits every bed equally. After a windy, salty day, inspect foliage. If the ocean-facing sides of leaves show burn or a fine crust, you’ve found the spray line. The fix isn’t magic; it’s placement. Plants with high salt tolerance go in the front line, moderately tolerant choices sit one row back, and the truly tender beauties stay behind a windbreak. Draw that gradient on paper and you’ve done half the design work already.

Wind matters just as much. It doesn’t have to be a hurricane; a steady onshore breeze desiccates leaves and wobbles new roots. Watch where the breeze accelerates: long side yards, alley-like gaps between houses, the corner where a fence funnels gusts. Those are the places to slow air down with structure or planting.


Build the Garden Around the Wind, Not Against It

A good coastal garden doesn’t try to stop the wind; it filters it. That small distinction changes plant health. Think in layers.

  • Front filter. On the sea-facing edge, use a loose, slightly porous hedge or mixed shrub line. When wind can slip through leaves, it loses speed without creating turbulence. Yaupon holly, wax myrtle, and pittosporum do this well; their small, tough leaves shrug off spray and sun. Shaped as “clouds,” not a solid wall, they become living baffles.

  • Inner structure. A second layer—taller shrubs, airy small trees, and upright grasses—casts filtered shade and tames the day’s hottest hours. Podocarpus, dwarf southern magnolia in protected spots, and pink muhly grass give volume without feeling heavy.

  • Garden rooms. Fences with small gaps, trellises set at slight angles to the breeze, and vine-clad pergolas break long wind runs. You’re not building a fortress; you’re carving out microclimates where tender perennials and bold foliage can thrive.

When a major storm is forecast, preparation beats repair. Reduce sail area by tying back canes, securing light furniture, and opening gates that might act like parachutes. After the blow, rinse foliage and hardscape to remove salt, deep-water beds to leach residue below the root zone, and prune only what’s broken. Give plants a week to show how much they actually lost before you cut hard.


Turn Beach Sand into Living Soil

Most coastal lots start as sand with a bit of organic dust. Your long game is to build a sponge: a soil that holds moisture, trades nutrients with roots, and still drains well after a storm.

Skip the temptation to dig giant holes stuffed with amendments; that often creates a bathtub that fills during summer downpours. Instead, amend above ground and let biology work. Spread two to three inches of compost or leaf mold over beds and gently fork it into the top few inches. Repeat once or twice a year. Pine bark fines mixed into the surface add structure that doesn’t disappear overnight.

Mulch is not an afterthought here; it’s infrastructure. Two to three inches of pine straw or shredded bark slows evaporation, buffers soil temperature, and reduces salt splash. Keep mulch several inches off trunks and crowns. Where weeds are relentless, sheet-mulch first: a layer of plain cardboard or newspaper overlapped like shingles, then compost, then your mulch. It smothers invaders while feeding the soil ecosystem.

Sandy soils leach nutrients quickly. That doesn’t mean “more fertilizer”; it means slower sources and smaller, split doses. Use controlled-release blends for shrubs and palms in spring and again lightly in early summer. For flowering perennials, a light bi-monthly feeding during the warm season is usually plenty. If you’ve never run a soil test, do it once. You’ll learn your pH and what you’re truly short on.


Water for Roots, Not for Leaves

In heat and humidity, overhead sprinklers waste water and invite disease. Drip lines and micro-sprays are the coastal gardener’s best friend because they deliver water to the root zone with minimal loss. Aim for deep, infrequent watering that soaks the top 8–10 inches, then let the surface dry slightly before the next cycle. New plantings need a ramp: every other day for two weeks, twice a week through week eight, then weekly as roots establish. Pair irrigation with mulch and you’ll see leaf scorch drop and growth rates increase.

Rain is an asset when you capture it. Gutters feeding rain chains into barrels or straight into swales recharge beds and help flush salts. Slightly raised edges on beds keep irrigation where you want it during long, windy afternoons.


Choose Plants That Earn Their Place

A plant can be beautiful and still be a poor fit for the front line. Match tolerance to exposure, then choose for texture, color, and seasonal rhythm. Near the ocean or a wide river mouth where spray is common, tough evergreens and silver- or thick-leafed shrubs handle the brunt. Yaupon holly—especially dwarf forms—makes fine clipped shapes that don’t blink at salt. Wax myrtle works as a quick screen and a wildlife magnet. Shore junipers knit slopes together and roll over edges. In front of those, blanketflower, coreopsis, and moss rose light up hot sand with flowers that don’t wilt in noon sun.

A row or two inland—or just behind a hedge—your palette widens. Podocarpus forms clean, vertical walls that carve space from the wind. Beautyberry brings shock-purple fruit in late summer for birds and color for you. Pink muhly creates a soft haze in fall that reads as evening light even at midday. Many gingers, cannas, and crinums shrug at summer heat and pop back after mild winters, especially in sheltered corners.

In courtyards and entries protected by walls, you can lean into the site’s “rainforest look.” Aspidistra lays a dark green carpet under taller leaves. Hardy gingers deliver fragrance and height without begging for constant water. Philodendron selections add an architectural note. Here, texture is the point—broad against narrow, glossy against matte—so the garden reads cool even when the thermometer isn’t.

When you’re unsure about a plant, ask yourself two questions: Where on my salt gradient does it live, and what job does it do? If you can’t place it convincingly on both counts, pick something that can.


Two Real-World Layouts You Can Copy

Narrow Ocean-Edge Buffer (about 25–30 feet deep). Imagine the lot line closest to the water. The first eight to ten feet take the spray, so you run a low, rolling band of shore-tough greenery—junipers weaving in and out, dotted with pockets of blanketflower that call in pollinators. Ten feet behind that, plant sweeps of dwarf yaupon “clouds” clipped softly so wind slides through. Between mounds, nestle pink muhly or other drought-lean grasses that glow at sunset. The inner six to eight feet become your frame: a light screen of podocarpus or pittosporum that makes the rest of the garden feel like a room without shutting out views. A path of crushed shell or decomposed granite threads through, draining fast after rain and keeping feet out of damp soil.

Sheltered Courtyard “Tropical” (about 20×20 feet). Against the back wall, a trellis hosts a vigorous climber to lift the eye and filter afternoon glare. At the midlevel, clumps of hardy gingers and cannas create a rhythm—broad leaves, upright plumes, a few repeat colors. The ground plane turns dark and clean with aspidistra so every brighter leaf looks deliberate. Because the space is protected, you can tuck in a philodendron for bold form and a few flowering annuals for quick seasonal swaps. The trick here is balance: leave negative space so bold foliage has a stage and summer air can move.


The First 90 Days After Planting

Establishment is where coastal gardens succeed or fail. Plant when soil is warm but air is easing—early fall is ideal—so roots run before winter and you water less during the following summer. Dig holes twice the width of the root ball and no deeper, roughen slick sides so roots can penetrate, and set the plant so the top of the root ball sits slightly proud of the surrounding soil. Backfill with native soil; save compost for a top-dress so you don’t create a water-holding pocket.

Water deeply the day you plant. For the next two weeks, water every other day unless rain does it for you. Weeks three through eight, switch to twice a week. Weeks nine through twelve, go to once a week. Watch the plant, not the calendar: leaves should be firm at midday, new growth should look balanced, and the soil should be moist one to two knuckles down before you irrigate again.

Mulch immediately, keeping it off the stem flare. If wind threatens to scour the bed, wet the mulch after you spread it so it settles. Stake only what truly needs it. In wind-exposed beds, slightly looser staking lets a trunk flex and strengthen rather than snap.


Month-by-Month Care for the Coastal Southeast

January and February are for structure. Prune evergreens to preserve natural shape and wind-firm branching. Check for rubbing limbs and remove weak, codominant leaders from young trees. Walk the garden after a blow and note where wind still whips; those are targets for spring planting.

March and April bring growth and humidity. This is the time to add sun-loving perennials and grasses, refresh a thin mulch blanket, and look hard at airflow. If a bed stays damp after every shower, thin surrounding foliage to let breezes do some drying. Feed heavy feeders with a modest first dose of slow-release fertilizer and leave the rest to warmer weather.

May and June switch on summer. Keep irrigation deep and less frequent, not daily and shallow. For brand-new perennials, pinch off the first flush of flowers so energy goes into roots. Inspect stakes and ties before the first summer storm—flex, don’t choke. Where edges look tired, top-dress with compost and pull mulch back over it.

July and August test everything. Water early so leaves dry quickly. If a newborn bed looks tired by 2 p.m., provide temporary afternoon shade with a scrap of shade cloth or a strategically placed market umbrella. Deadhead long-bloomers like blanketflower to keep color rolling. If a salty blow hits, rinse early the next morning and deep-water that evening to push salts down.

September and October are your second planting window and the best time for shrubs and trees. Roots run on warm soil while air cools; stress drops. Divide clumping perennials that outgrew their spaces, refresh mulch, and reset stakes you won’t need by winter.

November and December are for cleanup and resilience. Replace cracked trellis ties, check gutters and rain chains before winter fronts, and clear storm-catchers like loose lattice. Sharpen and oil tools so you’re ready for the quick jobs winter throws at you.


Troubleshooting Three Common Problems

Salt burn on leaves facing the water. That pattern tells you the front line is under-protected or planted with the wrong species. Rinse after events, water deeply to leach the soil, and add a filtering hedge or density to the one you have. Swap the first row for tougher species and push the tender favorites a row back.

Plants that wilt even with irrigation. The problem is usually shallow roots and naked soil. Increase mulch to a consistent two to three inches, convert to drip or lengthen run time so water penetrates, and add surface organic matter over the season. As the soil sponge improves, watering intervals can grow longer without stress.

Beds that look great in spring and collapse by August. Heat and solar load outpace the species mix. Plant more in fall so roots are ready, create light afternoon shade with a small tree or trellis, and lean harder on plants that keep their cool—shore junipers, muhly, coreopsis, gingers, and yaupon forms—then use tender accents sparingly in protected nooks.


Make Your Garden Work Harder With Design Details

Use light to your advantage. Silver foliage near paths bounces dusk light; dark leaves like aspidistra create calm in bright courtyards. Frame views with verticals (podocarpus, trellised vines) so the eye travels and the garden feels larger.

Think in families of texture and color. A garden along this coast reads best when three or four textures repeat—fine grass, glossy leaf, matte medium leaf, bold tropical. Repeat them across beds, changing the proportions so each space feels related but not copied.

Plan your internal links, just like a website. In plant terms, that means a strong hub—a small tree or a clipped evergreen mass—connected by satellite textures and seasonal color. It also means maintenance flows: easy paths for hauling mulch, irrigation access that doesn’t require acrobatics, and hose bibs that reach without kinks.


A Practical Publishing Note

If you’re turning this guidance into a blog post for readers in the Coastal Southeast, lead with the site-reading framework (salt gradient, wind, microclimates), then move into soil building and water strategy, and finish with plant examples and two layouts they can copy. Demonstrate the approach with photos from wind-filtered hedges, front-line salt-tolerant drifts, and a shaded courtyard vignette. A short FAQ at the end—how to flush salt after storms, whether to fertilize sandy soils, what to plant near direct spray—will capture quick answers without breaking the narrative.


Final Thought

Coastal gardening rewards the patient and the observant. Design for wind and salt first, invest in living soil, water with purpose, and choose plants that match your exposure. Do those four things and everything else—flowers, fragrance, wildlife, and year-round structure—comes easier. The coast will still throw its curveballs, but your garden will bend instead of break, and that’s the whole game.